/ Monday, 20 March 2017 / No comments / solidworks
Tutorial # 5 : SolidWorks ASSEMBLIES and standard Mates
In this tutorials we will see how to make assemblies from parts.how to use standard mates and join parts in assemblies.We will make Engine parts assembly.
Task: Standard Mates
Create the four parts given.
· Chamber Block
· Piston Coupler
· Piston
· Crank Shaft
SolidWorks allows the user to make assemblies that are basically the combination of parts joined together to allow for motion and to check if they fit properly together.
This is a tutorial and a lab task combined. You will be given basic hints on how to progress. The rest is up to you!
Now, after you’ve made all 4 parts, save them with the same name as given on their drawings, after which start a new assembly and use insert component to insert the first part. The Chamber Block.
The first part added in an assembly is always fixed. You cannot move it. Now insert the crankshaft.
Click on the crankshaft and move it around. Now to mate them!
Click on mate. Now select the two highlighted faces. Make sure the coincident mate is checked.
Coincident: This mate makes sure that both selected surfaces (they need to be flat) are aligned in the same plane. Since your crankshaft is the same length as the chamber block, in some orthogonal views it is going to be perfectly aligned with the chamber block.
Concentric: This mate aligns the center point of two or more circular faces. We shall use this to fit the crank shaft into the holes at the ends of the chamber block.
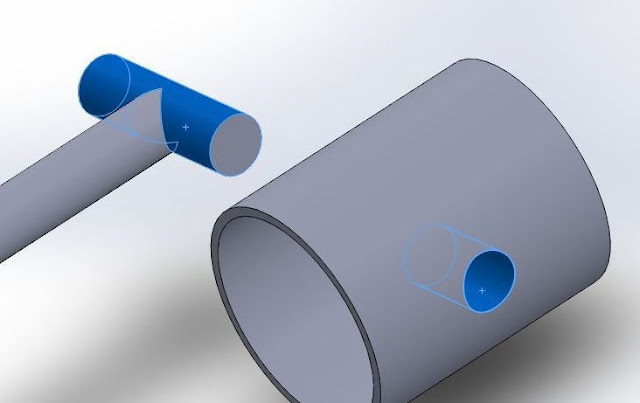
Now to add the pistons. Start by inserting a piston and a piston coupler.
Use concentric mates to join these two surfaces together.
Now, since we need the coupler to be in the exact center of the piston, we shall use reference geometry to align them. Use the feature manager once you’ve started mate. Using the feature manager, you can select an individual part’s planes. Open both the Piston and the Piston Coupler and select their right plane. If you made an error, SolidWorks will give you an objection on the mate you’re trying to create.
Now. Using, parallel mate, and concentric mate, place the first piston and coupler into the first socket. Parallel mate the front (or back) face of the chamber block, to the back face of the piston. Concentric mate the hole in the chamber block and the piston
Attach the coupler to the shaft using another concentric mate.
Click and Drag the piston coupler towards and away from the chamber block.Now Add the other three Pistons.
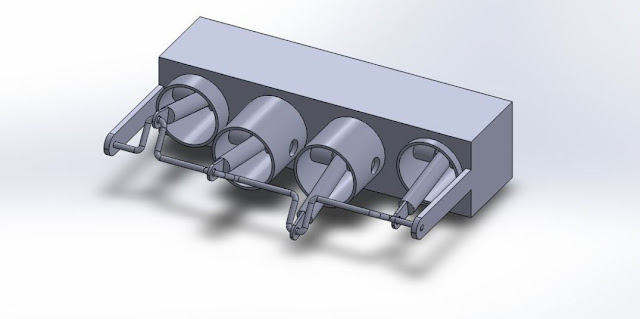
The complete asssembly will look like this:
Download the Solidwork files practice it and Enjoy...
Related Posts
Subscribe to:
Post Comments (Atom)


No comments:
Post a Comment